I have eventually got around to start tidying up my Youtube channel since I moved it and the process made a proper mess of everything 🤦♂️
Want to get started with Docker, containers and even using SQL Server on Linux in just 12 easy , hands on steps (short videos)? If you’ve moved onto this sentence then the answer to the previous question must have been YES!
Have a look, I’ve purposely kept them as short as possible, the total time for all 12 videos is less than 90 minutes so there really is no excuse 😉
I decided to throw together some steps on how you can start utilising SQL Server running on Linux in a Docker container a little more than just doing a docker run, connecting via SSMS/sqlcmd, running a few commands then blowing it away and saying you now know docker 🙂
DevOps, CI/CD, automation, whatever you want to call it is a massively hot topic at the moment and I’ll be running through how you can get yourself started with a database project (.sqlproj) and source control using Azure Repo (Repository). We will then run through how to take a Docker image (this can be stored in Dockerhub or Microsoft Container Registry) and push any changes to this via an Azure DevOps build pipeline to create a new Docker image with your changes applied. For the purposes of this blog post I will be using DockerHub but Part 3 will be using the Microsoft Container Registry (MCR) due to issues I have discovered in the Deployment pipeline in Azure DevOps meaning that I can’t use DockerHub.
This is quite a lengthy post so I will save the Deployment pipeline to run the newly created image in a Kubernetes cluster ready for UAT, Pre-Prod or even Production (if you’re brave enough) for part 3. Or, if you’re in Exeter for Data in Devon on Saturday April 27th, or DataGrillen on Thursday/Friday 20th/21st June then come and see my session where we will delve a bit more into this.
Seeing as most of this will be run in Azure, there are small costs associated with running the Kubernetes cluster but everything else in part 1 and part 2 are (at the time of writing) completely free – so no excuses! the list of tools used are listed below:
SSDT (Free)
Azure DevOps including Azure Repo (Free)
Docker for Windows Community Edition (CE)
DockerHub (Free, Ts&Cs apply)
Azure Kubernetes Service (AKS) (Not Free but costs can be kept low)
Install
SSDT
First off, in order to create our Database Project (sqlproj) then we will need to download and install SQL Server Data Tools. This will install a Visual Studio Shell so you don’t necessarily need a full blown edition of Visual Studio. You can download it here.
Setup Azure DevOps Account
Azure DevOps is a one stop shop for your Development life cycle requirements and can simplify the automation of an entire continuous integration (CI) and continuous delivery (CD) pipeline to Azure . There are several tools within it including:
Boards
Pipelines
Repos
Test Plans
Artifacts
There are paid for aspects of Azure DevOps. For example if you wish to make an Artifact available to teams larger than 5 users then you will have to pay $30/mth. Everything we will be using here is free!
To get started, you will need to create an account or if you have one already, sign in:
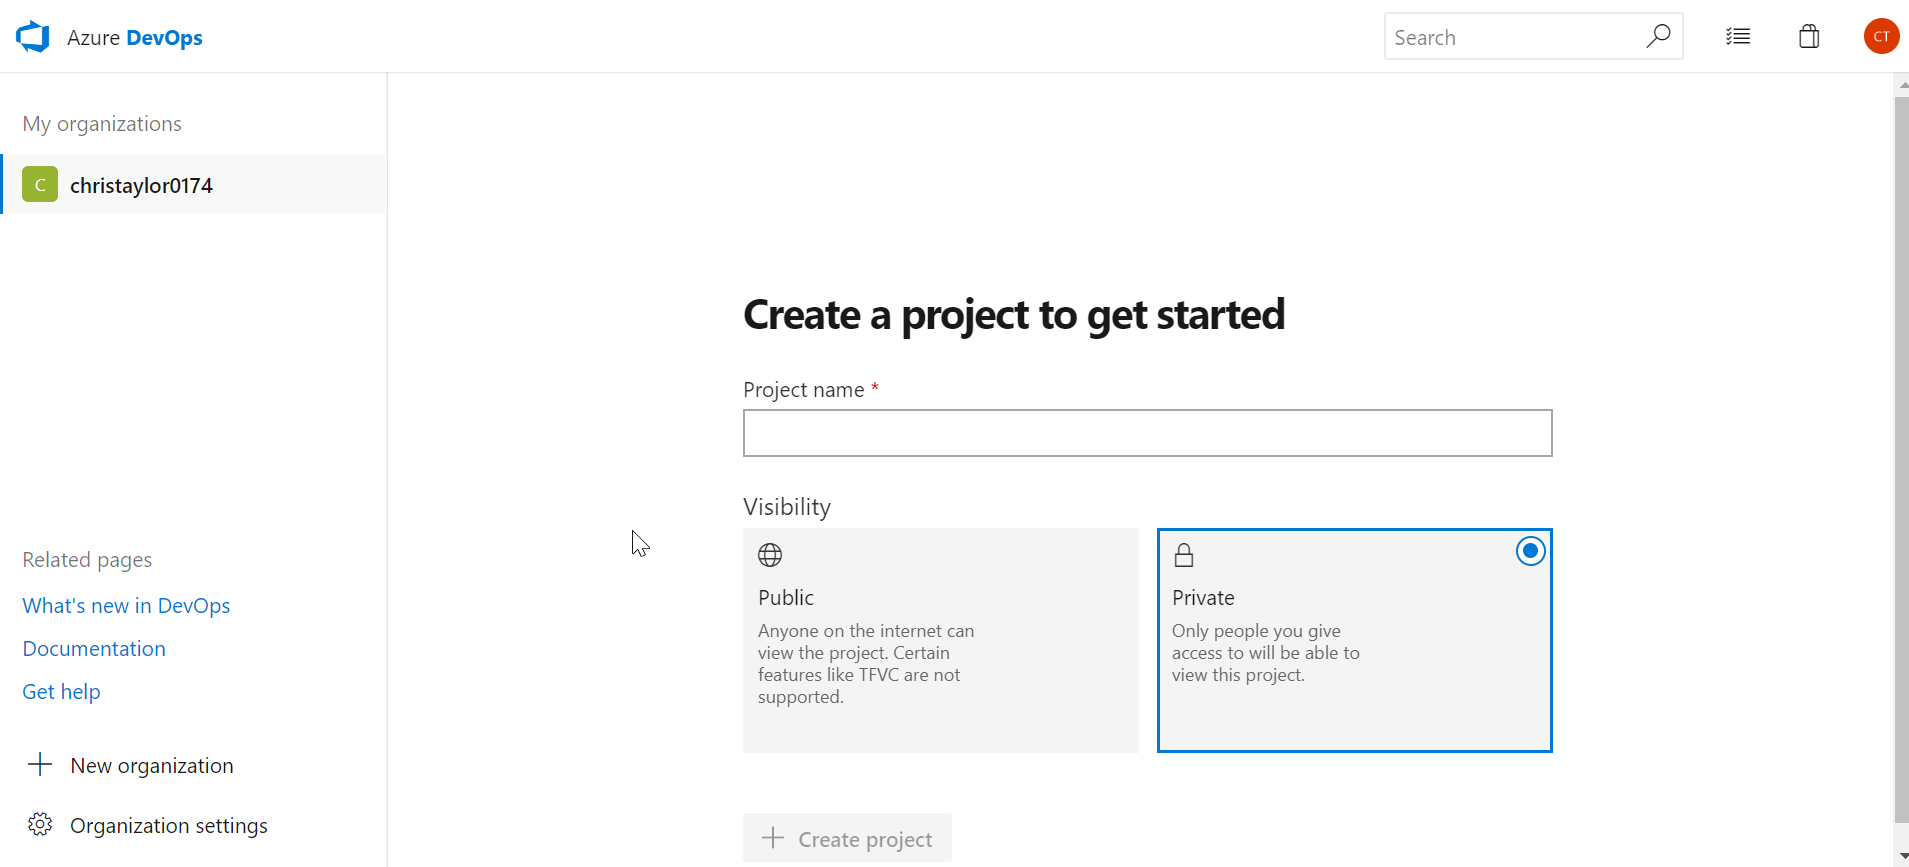
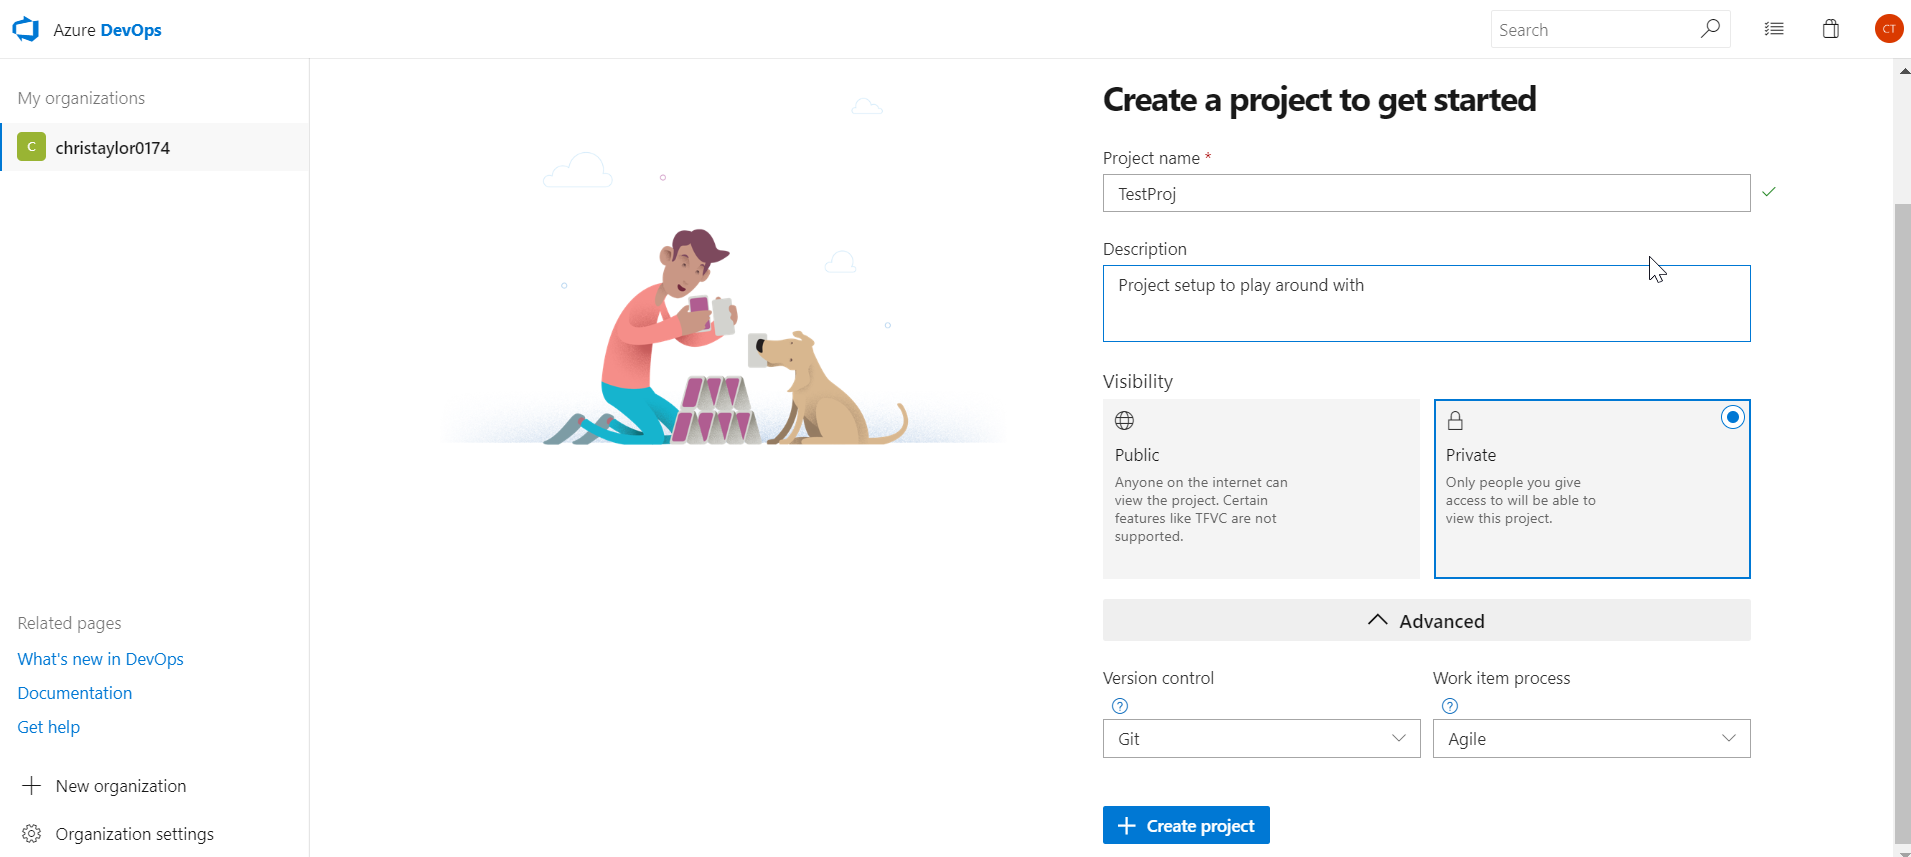
Once you have created your account and went through the various authentication/verification, you can start creating a project in Azure Repo. In the screen shots below you can see that even a Private repo is free which is fantastic!
Give it a name and Description if you wish and choose a version control type. I have chosen Git because that’s what all the cool kids are using.
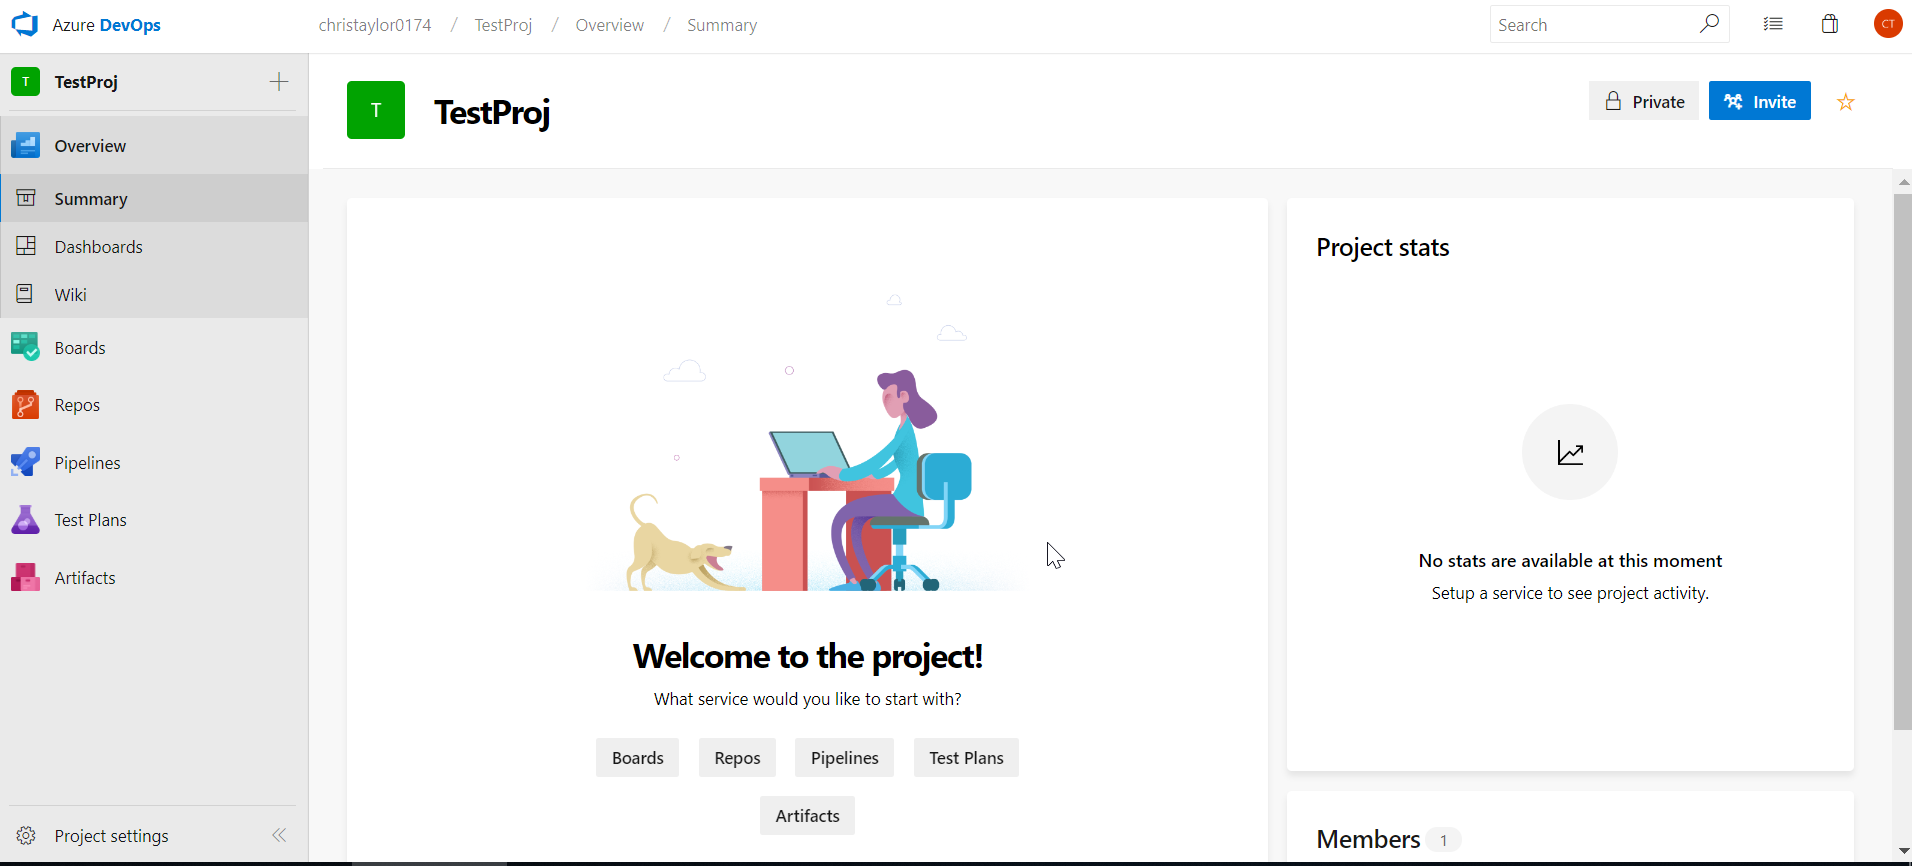
Congratulations! Your project is now created and ready to connect to using VS / SSDT.
Connect using Visual Studio 2017
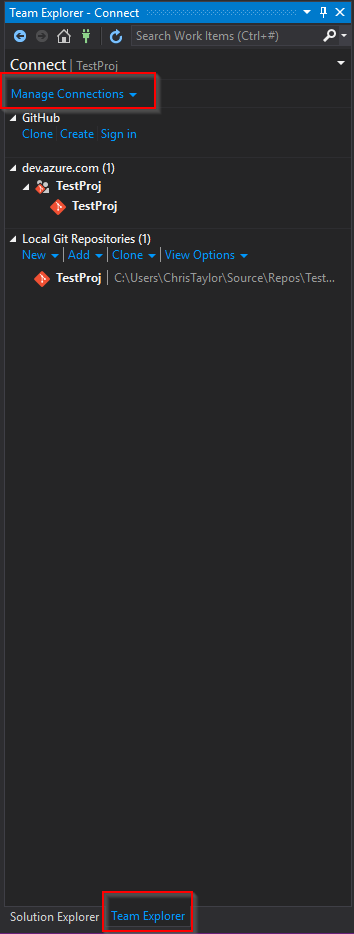
You can connect directly to your Azure Repo (Git) project directly from VS, this is done by selecting the Team Explorer menu option:
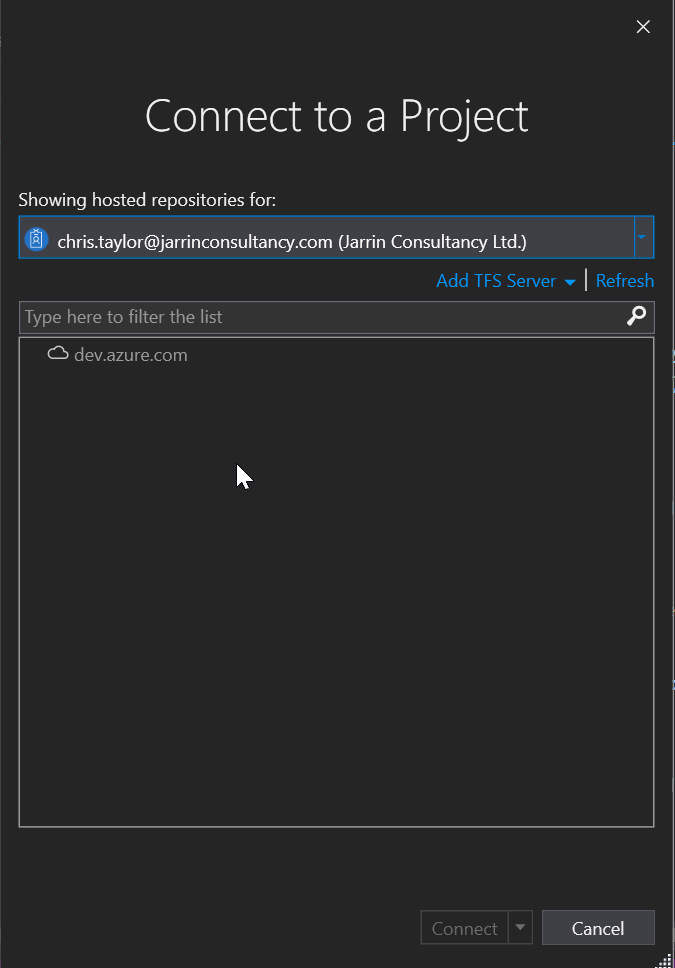
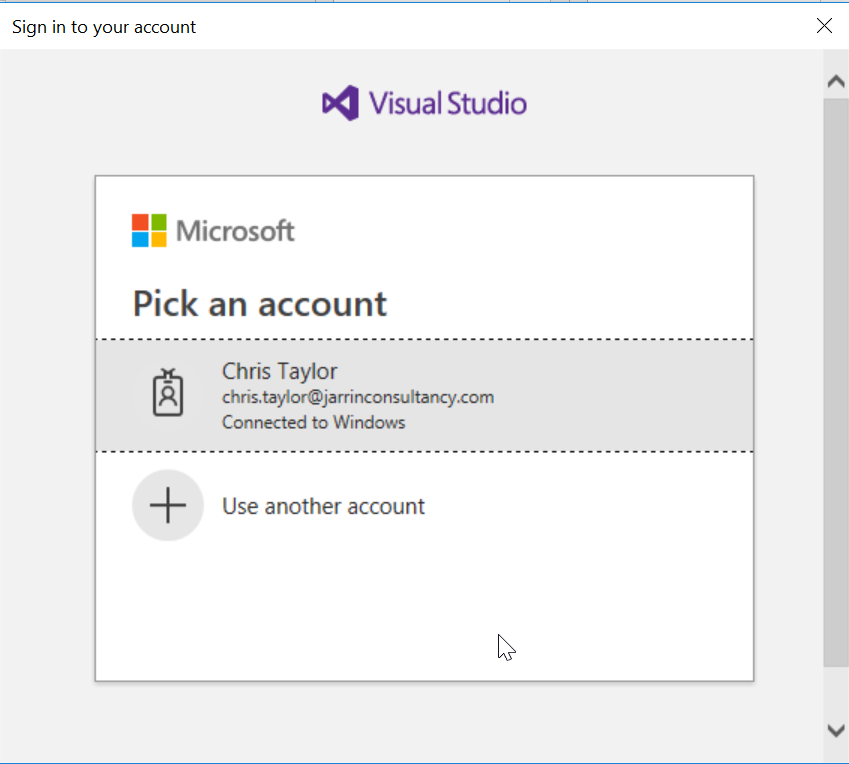
Enter your login details and select the repo
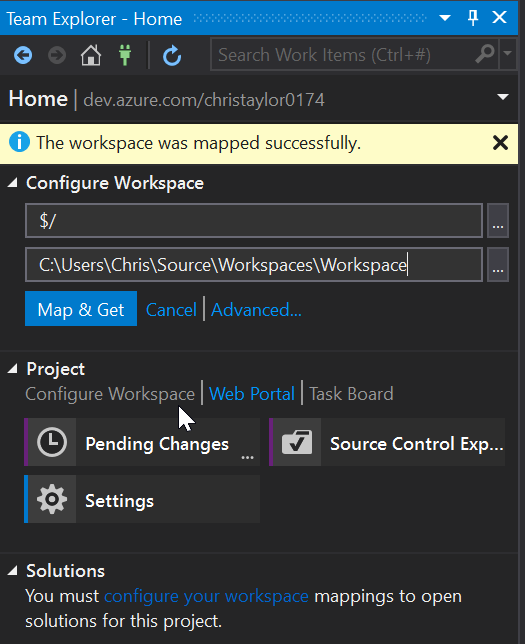
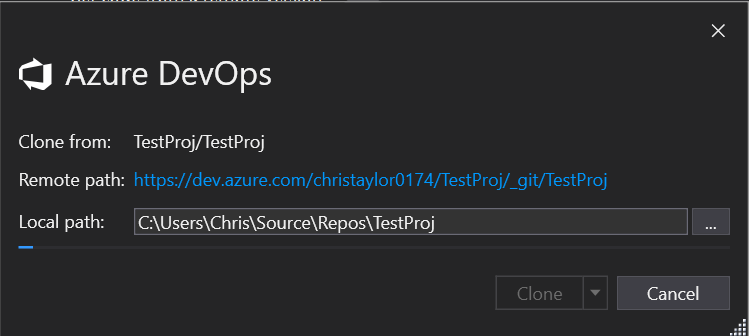
You will have to “Map” the Git Repo to a folder on your local machine, this can be anywhere so choose somewhere suitable.
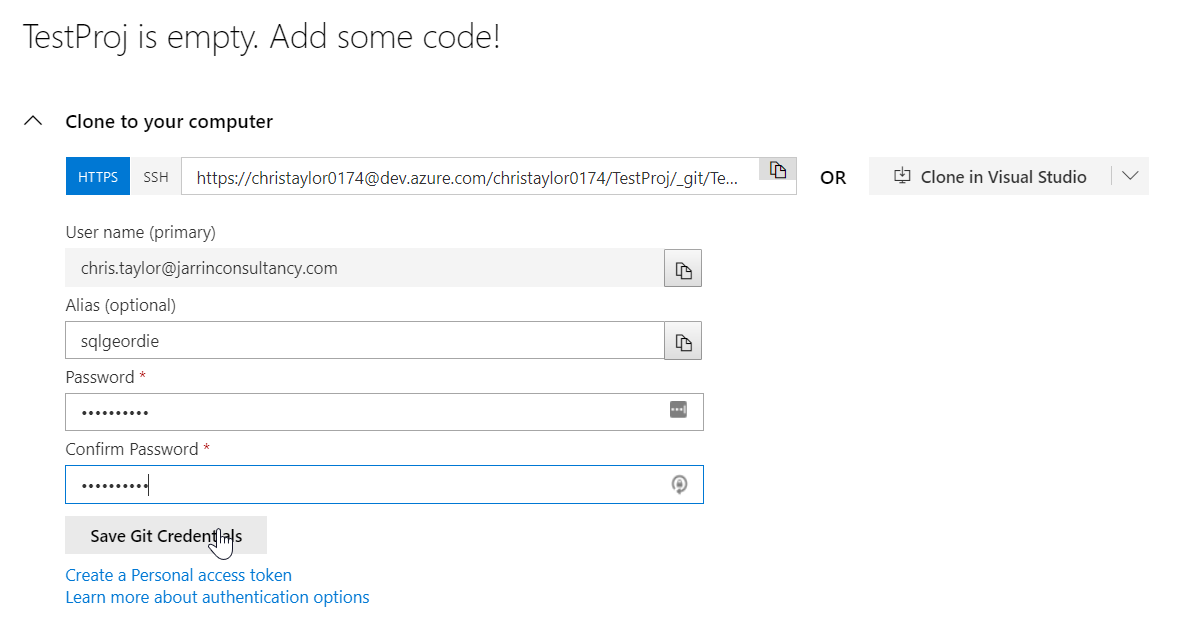
Enter the details you used to create the Azure DevOps account and Save Git Credentials so you won’t have to re-enter these later.
That is it, you are now connected to your Azure Repo so any project you make changes to locally can now be pushed to an online repository!
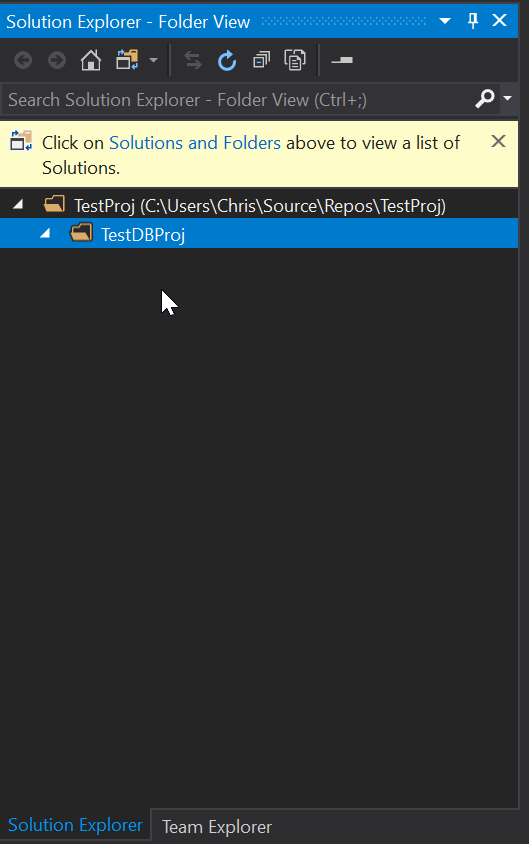
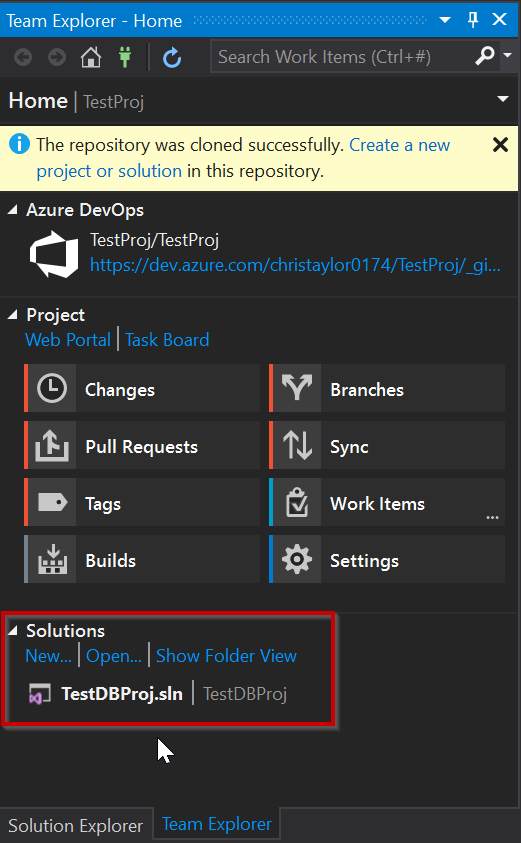
For this demo I have created a folder in the project called “TestDBProj” in Solution Explorer, this isn’t necessary but I like to try and keep things a little tidy:
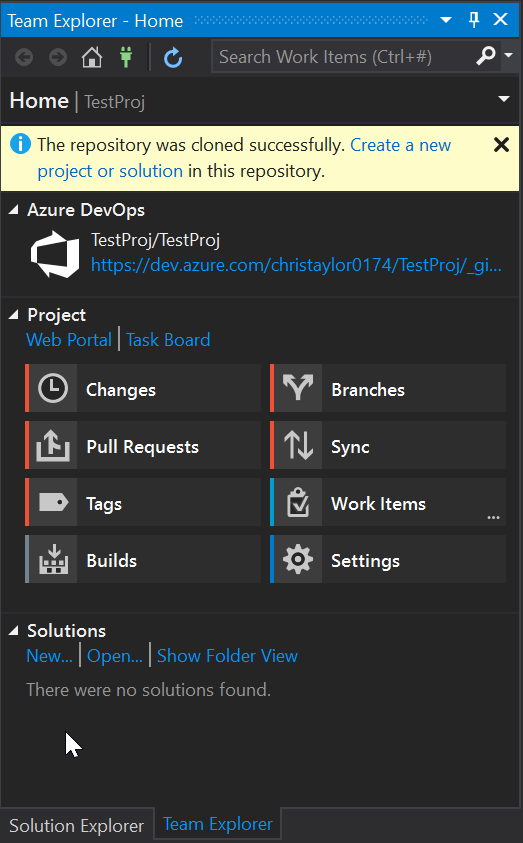
Looking at Team Explorer, everything is now setup and you have now cloned the TestProj project to your local development machine. We can now get started with making a few changes.
Create Database Project
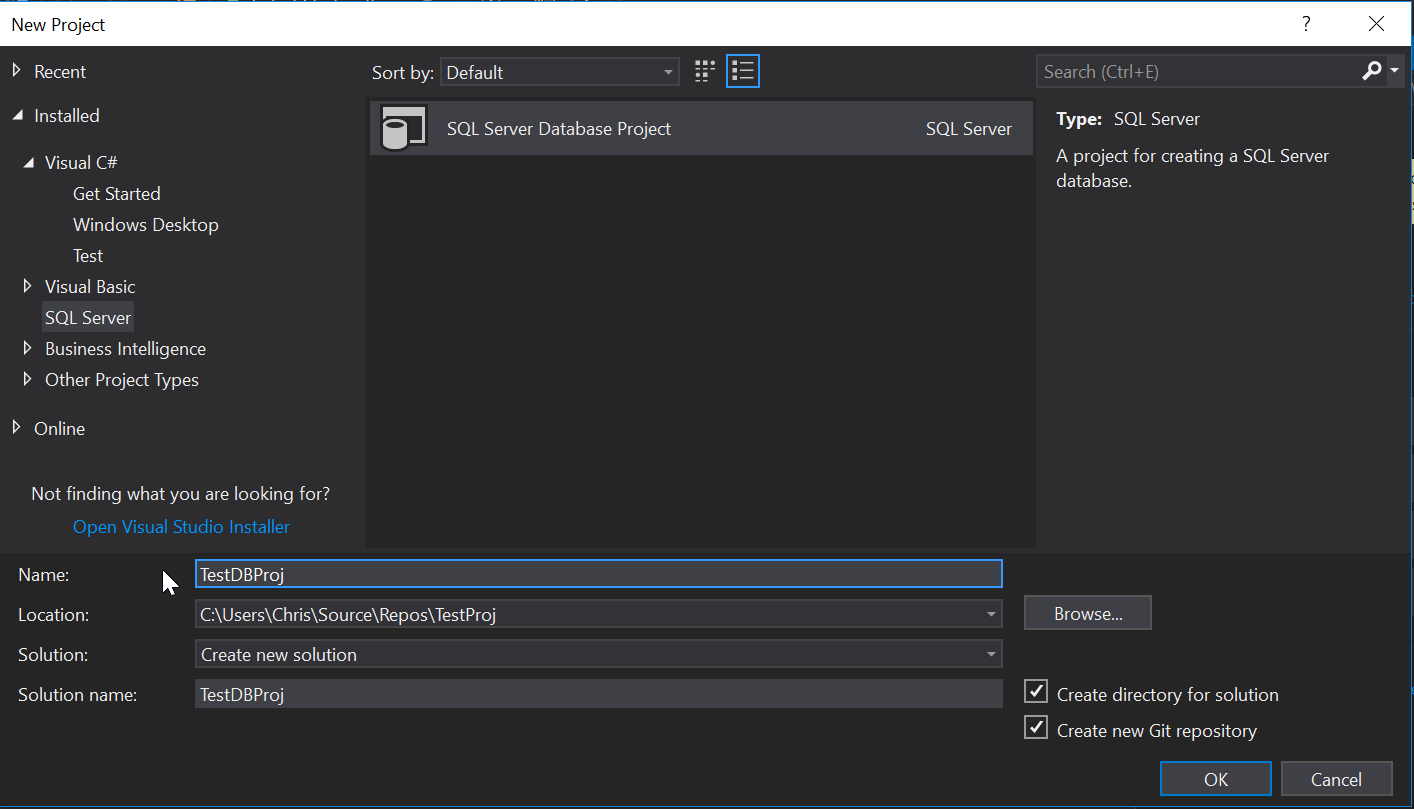
Seeing as TestProj literally has nothing in it, we need to create a new Database project and we can call it TestDBProj:
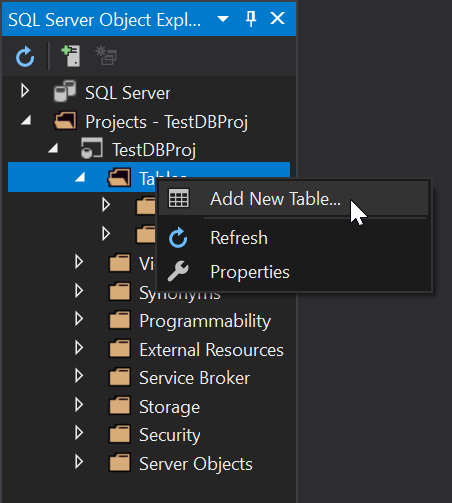
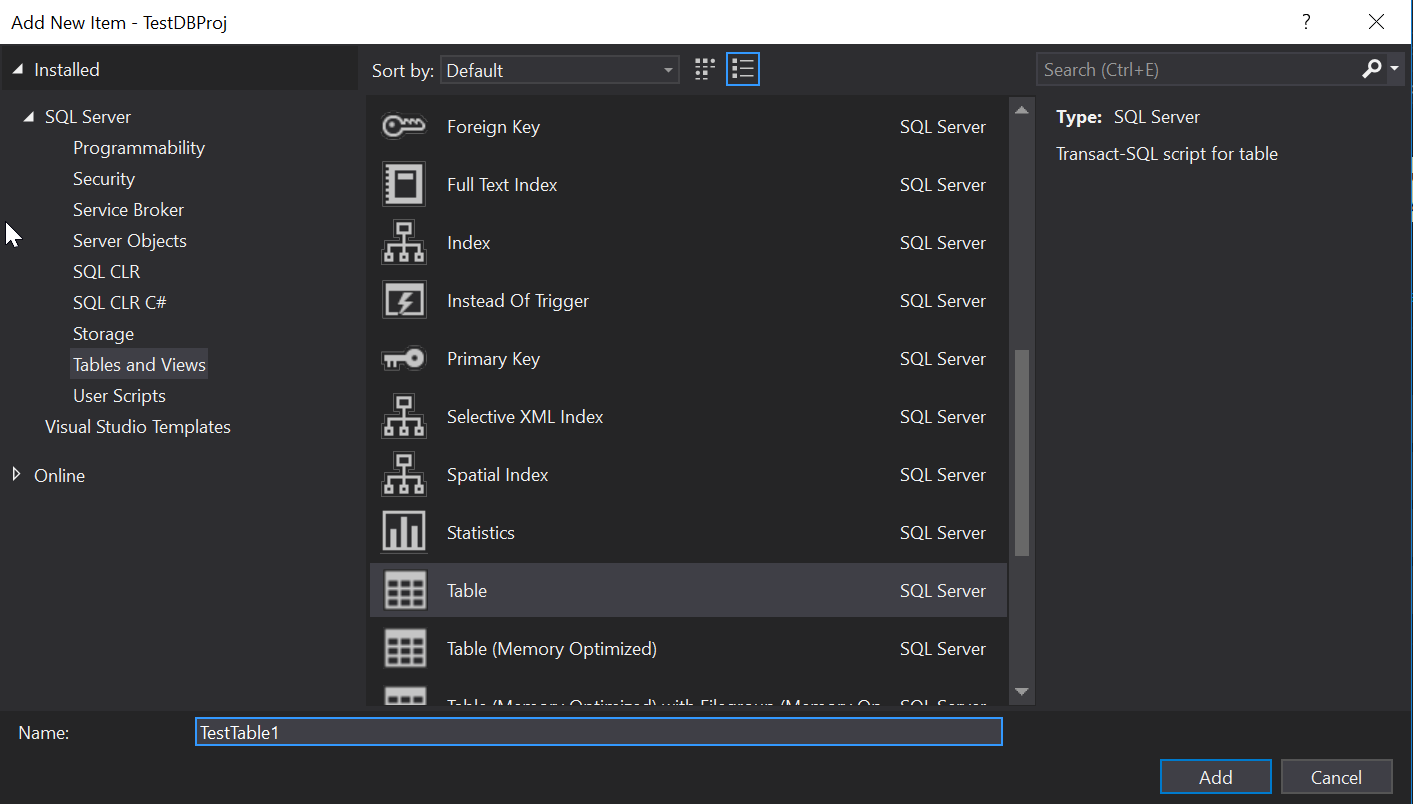
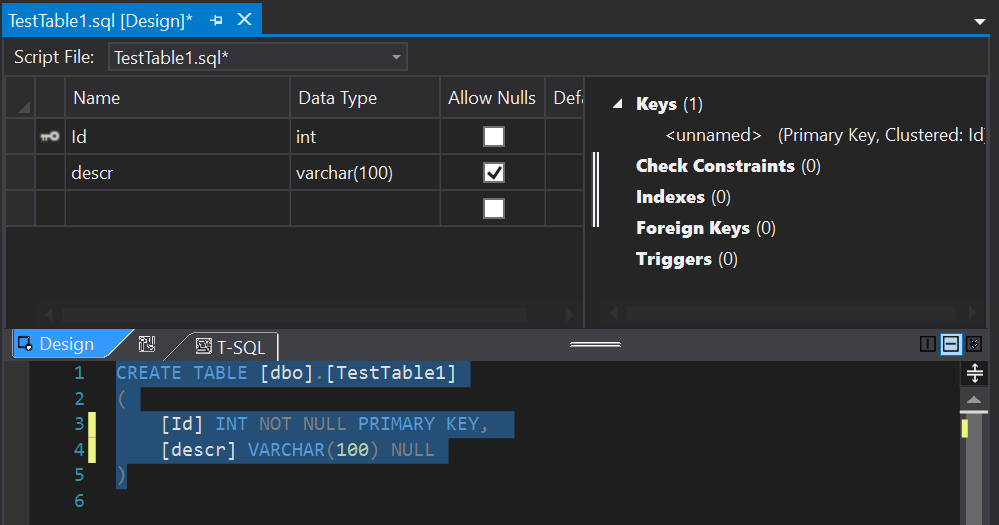
Fantastic, our TestDBProj is now created and we can start adding objects to it. At this point if you have a database schema you need to import you can do that using the schema compare but again, keeping it simple we’ll just add a new table called TestTable1:
Add a new column called [descr]:
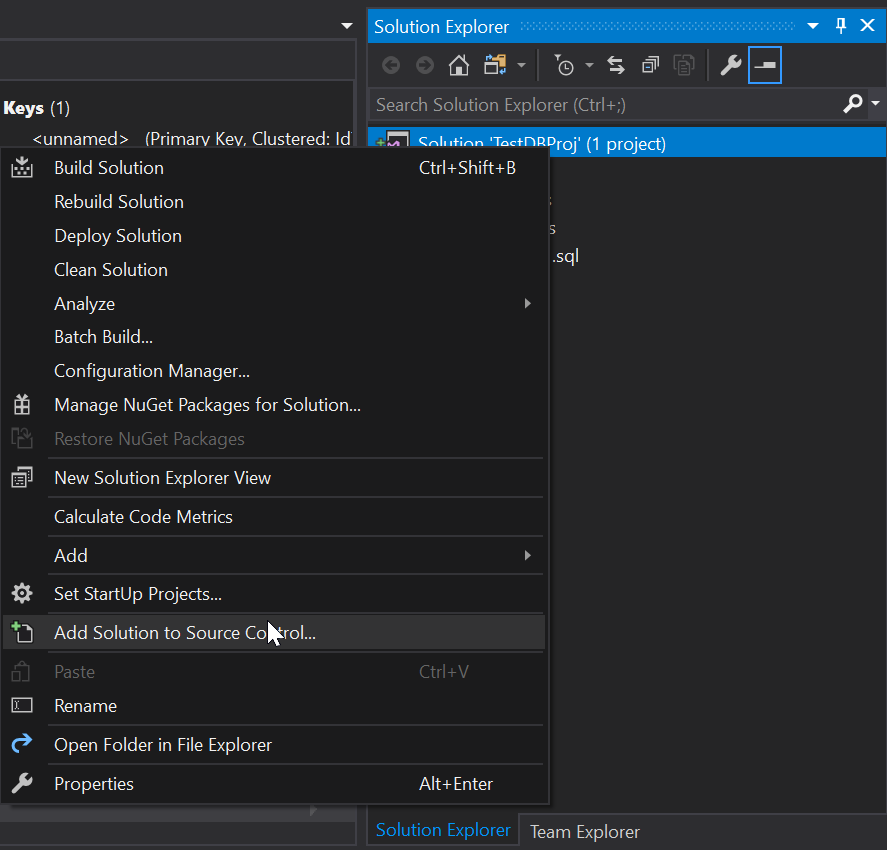
We’ve made some changes but at the moment our project has not been added to Source Control so let’s add it:
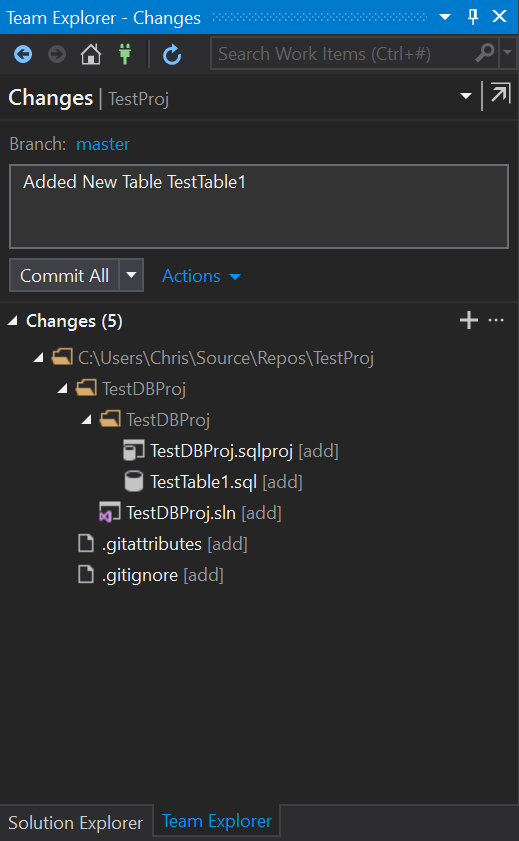
Check the changes and commit making sure you add a commit message:
NOTE: This can also be done via command line but as this is an introduction / getting started we are using the Gui.
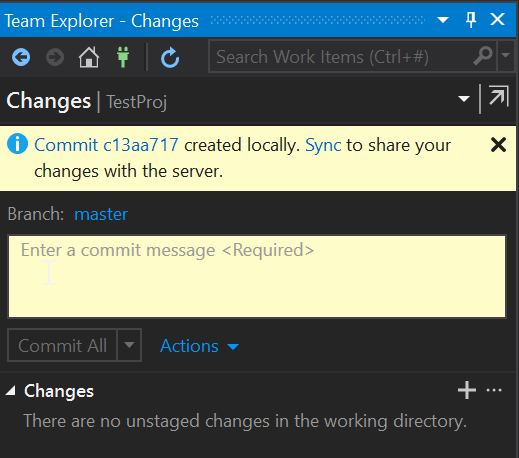
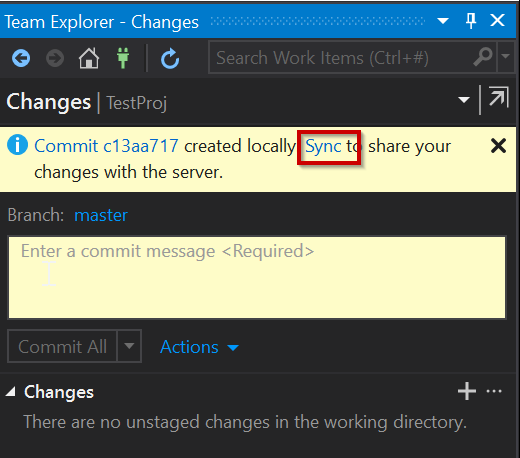
You should now get a message saying that the changes have now been committed locally:
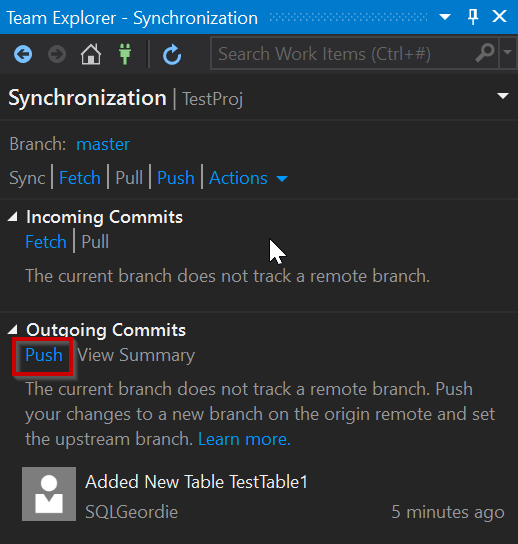
To get the changes into our Azure Repo we need to push them, or in the case of the Gui “Sync” our changes and using “Push”:
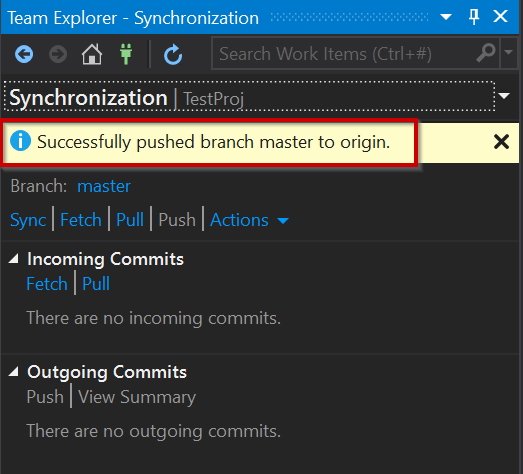
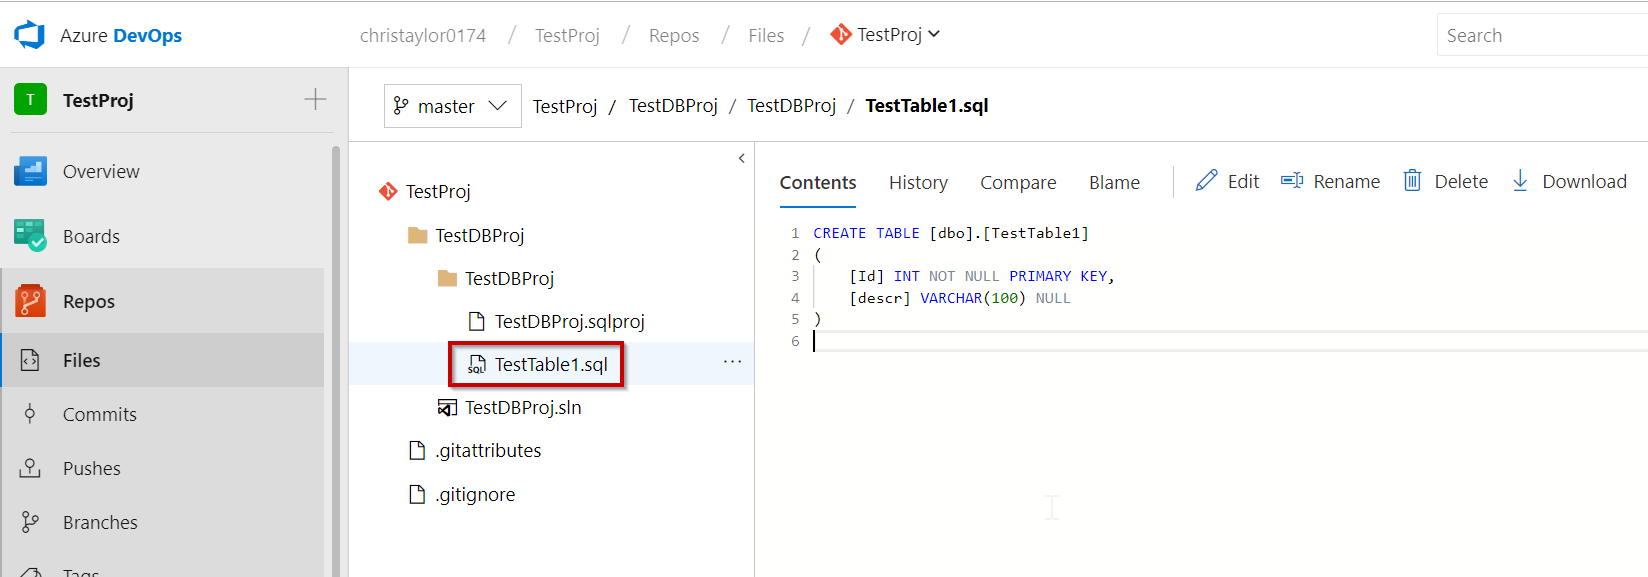
There we have it, our changes have now successfully pushed to our Azure Repo and we can check online and it should now be available:
In Part 2 of this series we will start looking at the Azure DevOps Build Pipeline and how to create a new (very basic changes made) Docker Image from an Image stored in DockerHub and push it back.
I have created some videos (no audio I’m afraid) of building an Azure DevOps Pipeline which will create a new docker image with the changes made to the project and deploy it to Kubernetes. These are part of the demos used as part of my sessions at Data In Devon and DataGrillen earlier this year.
I (and many others) have done a series of docker blog posts over the last couple of years but they’ve all tended to evolve around spinning up a SQL Server 2017+ container for testing or demo purposes. This is only really the start, think of the bigger picture here, once you have your database environment the world is your oyster.
This blog post will show how we can use SQL Server 2019 CTP2.1 running on Linux (Ubuntu) in a docker container as our data source for a Power BI environment in next to no time!
These steps show a very manual process for completing this setup, if it is something you are looking to do frequently then I suggest creating a Dockerfile and/or yml file and use docker-compose. This way you can have all your setup in one file and it will be a single statement to get your SQL Server 2019 environment up and running.
Once you have Power BI installed you will have to enable Hyper-V windows feature before installing Docker for Windows. If you don’t, the docker install will ask you if you wish to enable Hyper-V but in my experience this has rarely (ie. never) worked well – could just be me but I play it safe and enable it before installing. Running Linux containers on Windows 10 inevitably means that the Container will run a Isolated / Hyper-V Container which basically runs a cut down, lightweight Hyper-V VM.
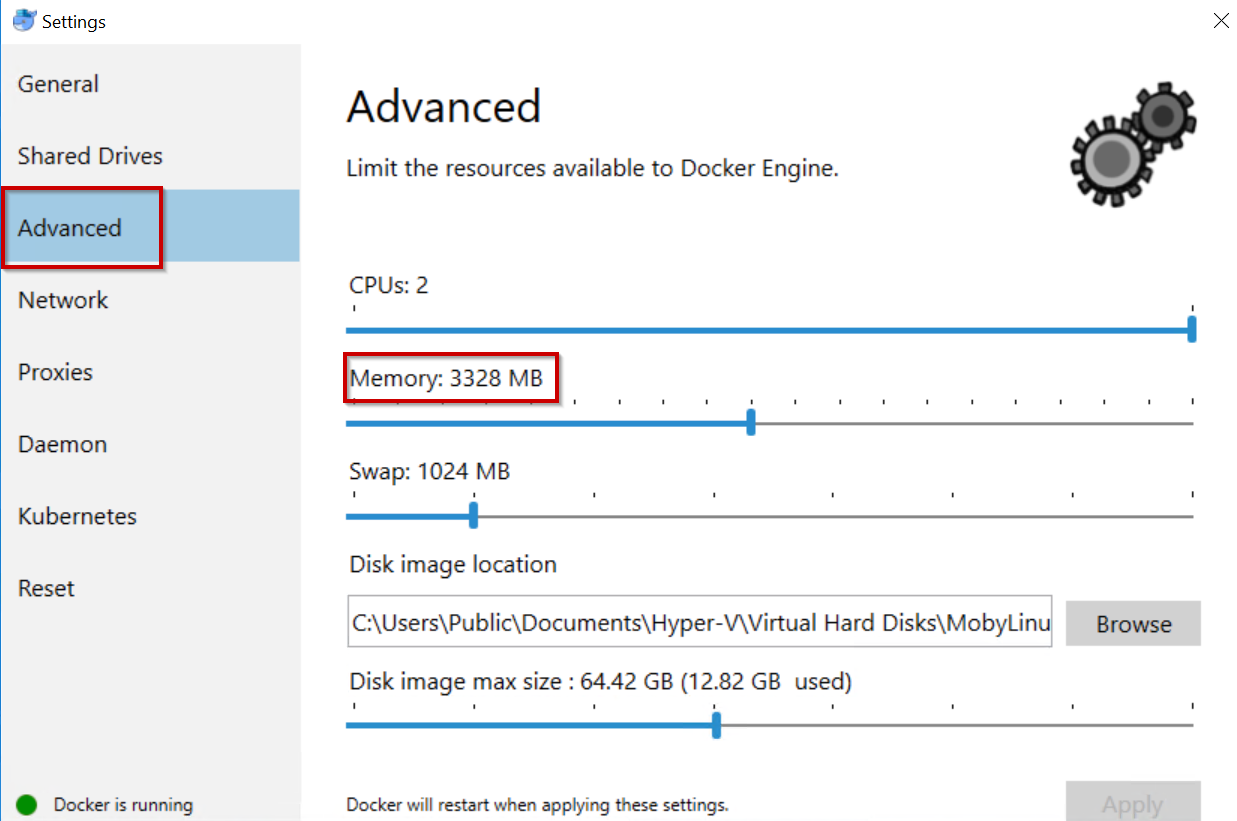
Once DfWCE is installed, you will have to modify the Memory settings to be at least 3250MB. By default this is 2048MB but this isn’t enough to run SQL Server On Linux Containers and needs to be amended.
Make sure this is min 3250MB
Once configured, we’re now ready to create our SQL Server 2019 CTP2.1 on Ubuntu. As we are going to be creating a container with a database that we can use the data from (ie. AdventureWorks2016CTP3), we’re first going to create a data volume and copy the bak file (from C:\Docker\SQLServer\Backups) to it so it is available to restore:
#Create dummy container to define and copy backup file
docker container create --name dummycontainer -v sqldatavolume:/sqlserver/data/ sqlgeordie/sqlonlinuxdemo:demo

#Check that the container exists
docker ps -a --format $psformat

#Copy AdventureWorks or whatever you like ;)
docker cp C:\Docker\SQLServer\Backups\AdventureWorks2016CTP3.bak dummycontainer:/sqlserver/data/AdventureWorks2016CTP3.bak

#Check what volumes you have
docker volume ls

#Don't need the dummycontainer anymore so get rid
docker rm dummycontainer
NOTE: We have “created” a container but don’t need to run it so the status will indicate that it is “Created” and not the up-time:
You may be asking why I’ve created a datavolume as opposed to just bind mounting my local folder to the container – good question. There are many blog posts out there explaining the pros/cons of both but for me the biggest reason is that mounting a host folder goes against everything Containers are about – portability. The container shouldn’t care about where it is or anything outside of it, bind mounting means that wherever this container is created, you will need that host folder setup and available. Using a data volume means we can reuse this for other containers, even on another host if we were in an environment that has access.
Now we have our data volume with a copy of AdventureWorks2016CTP3.bak, we can proceed to creating the container:
#Create SQLLinuxLocalPersist container
docker run  -e 'ACCEPT_EULA=Y' -e 'SA_PASSWORD=P@ssword1' `
--name SQLLinuxLocalPersist -d `
-p 1433:1433 `
-v sqldatavolume:/sqlserver/data `
mcr.microsoft.com/mssql/server:2019-CTP2.1-ubuntu

#Check it is running
docker ps -a
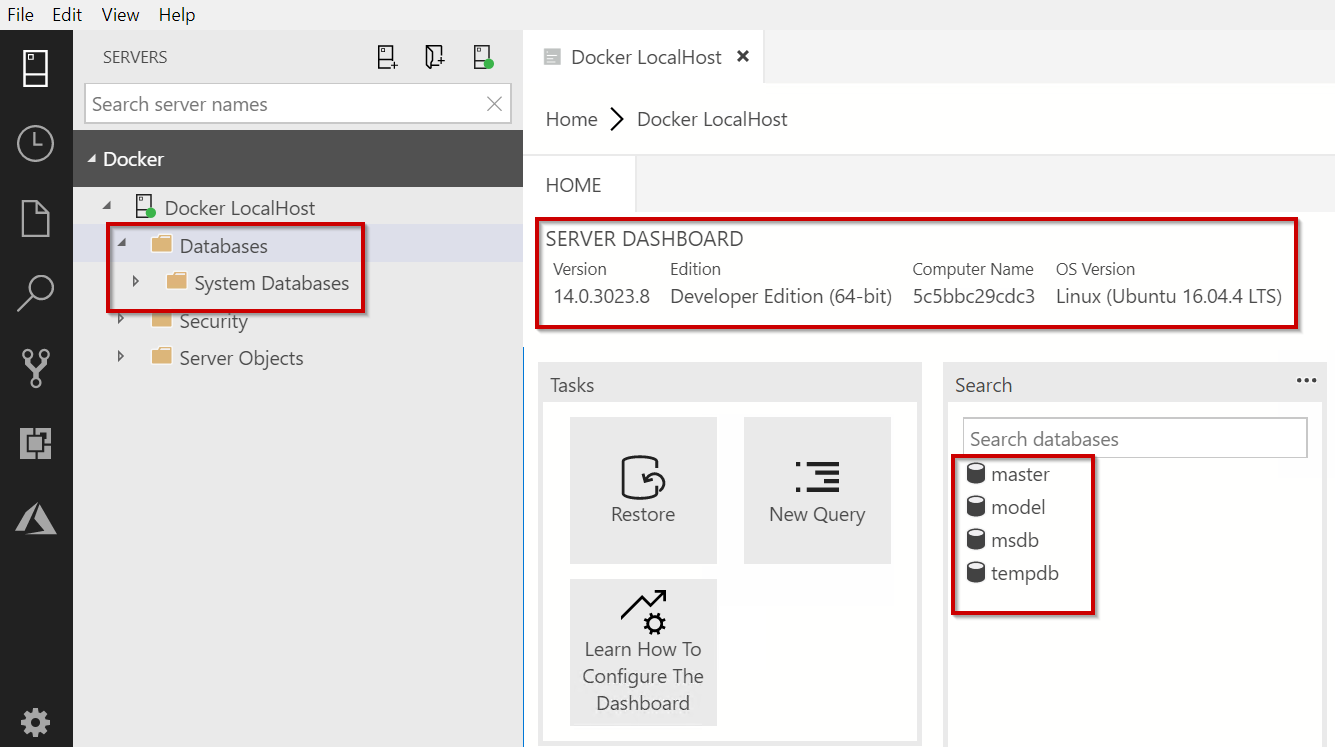
All going well, your container should be created and running:
The next step is to create the database from the backup, we will do this manually via Azure Data Studio (Other SQL Server Management GUI’s are available).
Simply connect to our locally created container. I have used the default SQL Server port of 1433 so we can use “Localhost”. As windows authentication is not currently supported, we have to use a SQL Login, in this example I’m using “sa”:
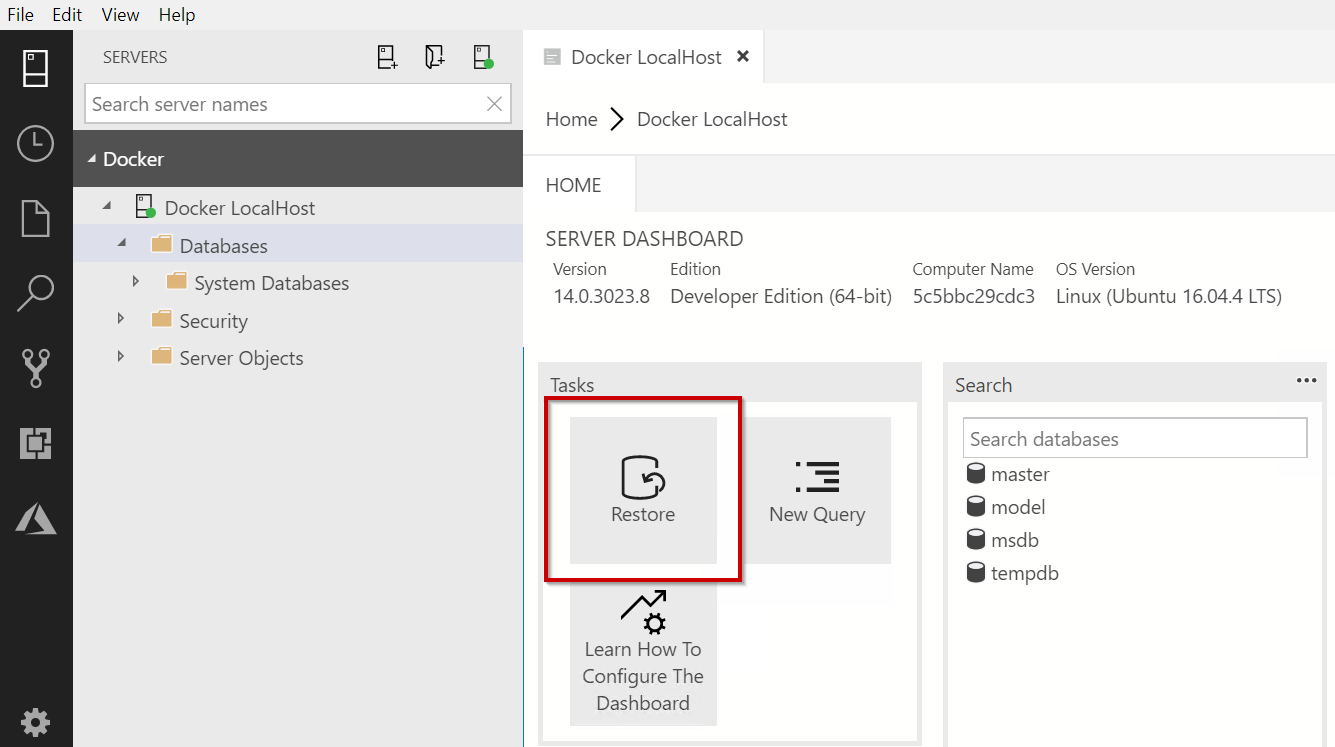
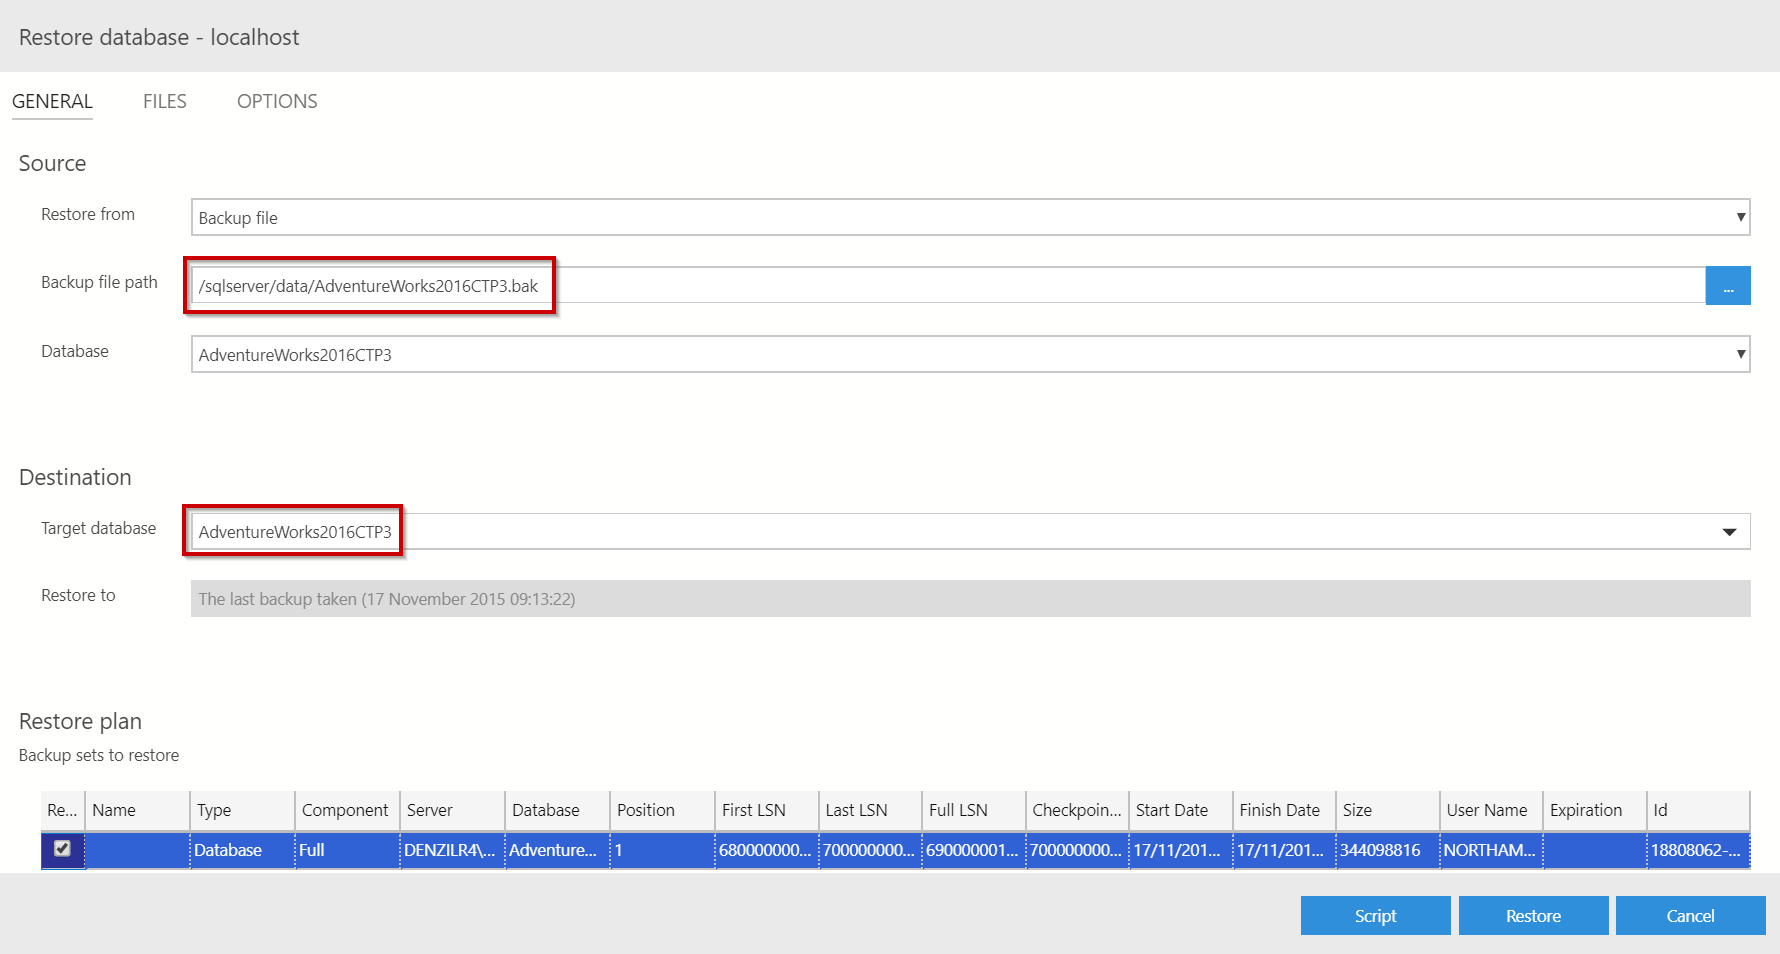
Next, we want to restore the DB:
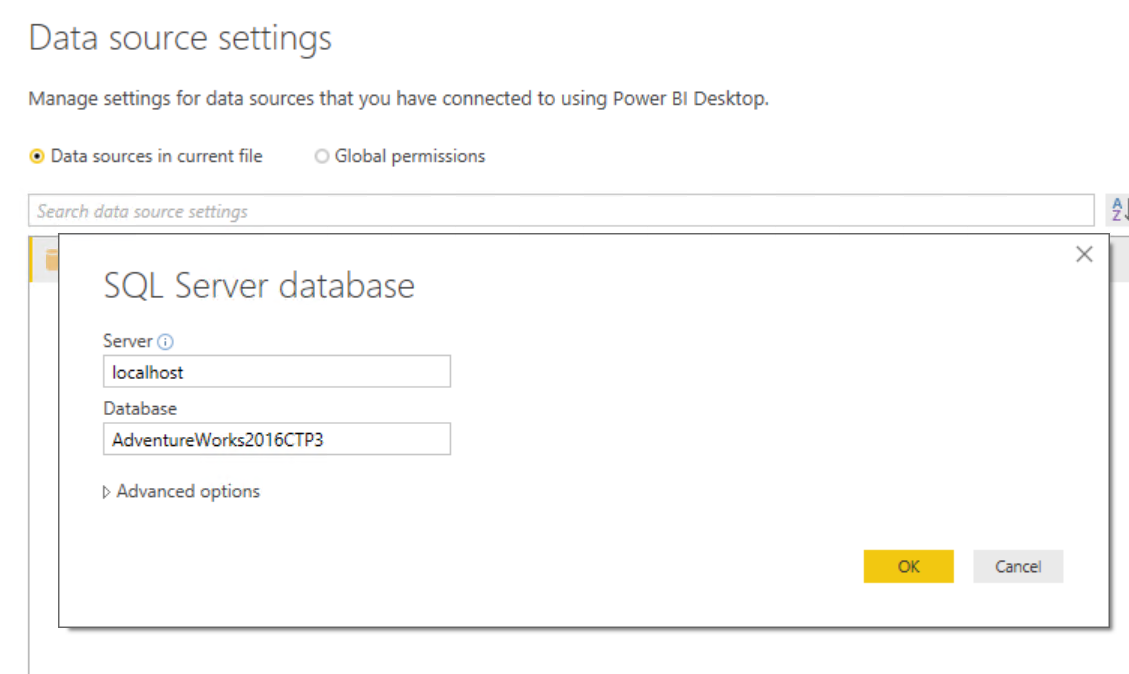
You should now have a restored version of AdventureWorks2016CTP3 ready to use and abuse in Power BI. Simply setup a connection to (again) Localhost, no port mapping is required in this instance but if you had a different port to 1433 you’d have to use something like: Localhost,15105.
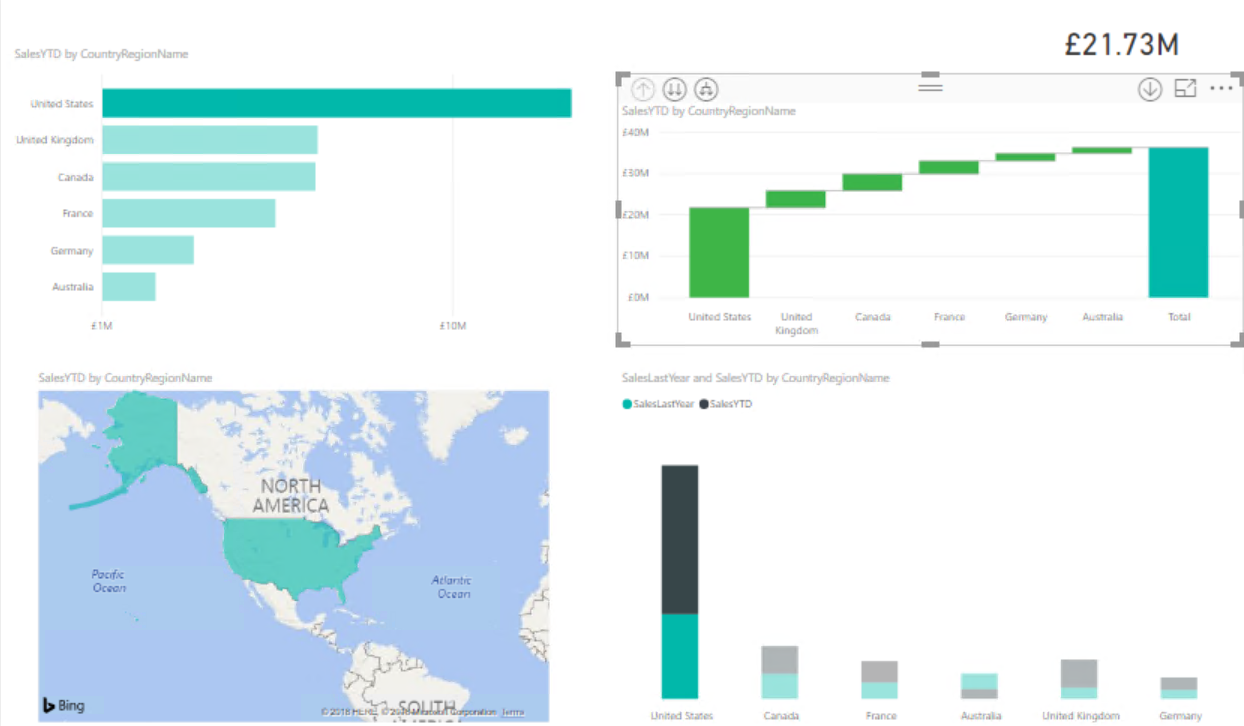
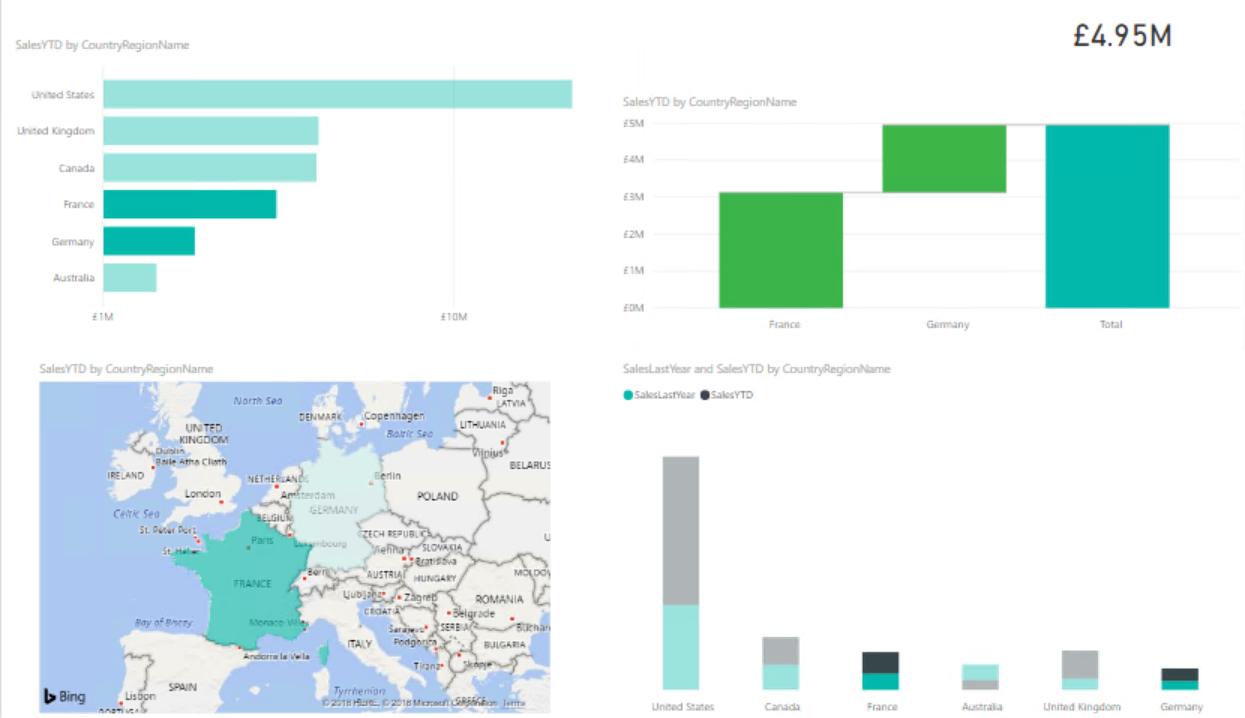
Once connected, you can play around with the data til your hearts content 🙂
There we have it, a fully working Power BI demo / sandbox environment ready for you to play around with. The longest aspect of this setup will be the downloading/installing of Power BI Desktop and DfWCE. Once setup, the scripting of creating the container can be done in a minute or two -AMAZING!!!!!
As with anything open source you’re prone to things changing without you necessarily being aware and the error message in the blog title is something that has been sprung upon me whilst tidying up demo’s for my latest session on Docker and SQL Server On Linux. I hadn’t touched these particular demo’s since October 2017 so as to when things stopped working, I don’t know but they certainly worked the last time I did the session but doing a re-pull of the images, things broke.
With the micorosft/mssql-server-linux images, if you wish to mount a volume to a container then you will experience an error message I’ve never seen in SQL Server:
The transaction log for database ‘master’ is full due to ‘NOTHING’.
Apparently I’m not the only one experiencing this and there is an issue opened (Since October 2017!!!) on GitHub and social.msdn.microsoft.com describing the issue.
I have tested:
micorosft/mssql-server-linux:latest
micorosft/mssql-server-linux:2017-GA
and the issue was apparent on both images. The reason as highlighted on GitHub seems to be related to the filesystem, seeing as I’m running Docker for Windows I can’t change my file system from ext3 to ext4 like what others have done.
There is a workaround for this. The issue (certainly for me) only seems to be apparent if you try to mount a volume to a folder that already exists (ie. /var/opt/mssql/data/), mount to a new folder (ie. /sqlserver/data) then it will work:
Or if you can, create a data volume instead and use that 😉
Once you have the files you need (ie. .bak file) in the /sqlserver/data folder within the container, you can then restore it using WITH MOVE to the /var/opt/mssql/data/ folder and this will work.
Slides and Demo’s from Chris Taylor’s latest “Introduction to Docker” session at the SQL Glasgow Usergroup and Data n Gravy in Leeds are now uploaded to GitHub.